If you want to create a new pipe in Revit or change the size (diameter) of an existing pipe, and the size you need is not listed for you to pick, then please read this blog post. Please keep in mind that you can always contact NovelBIM if you need help with your Revit projects.
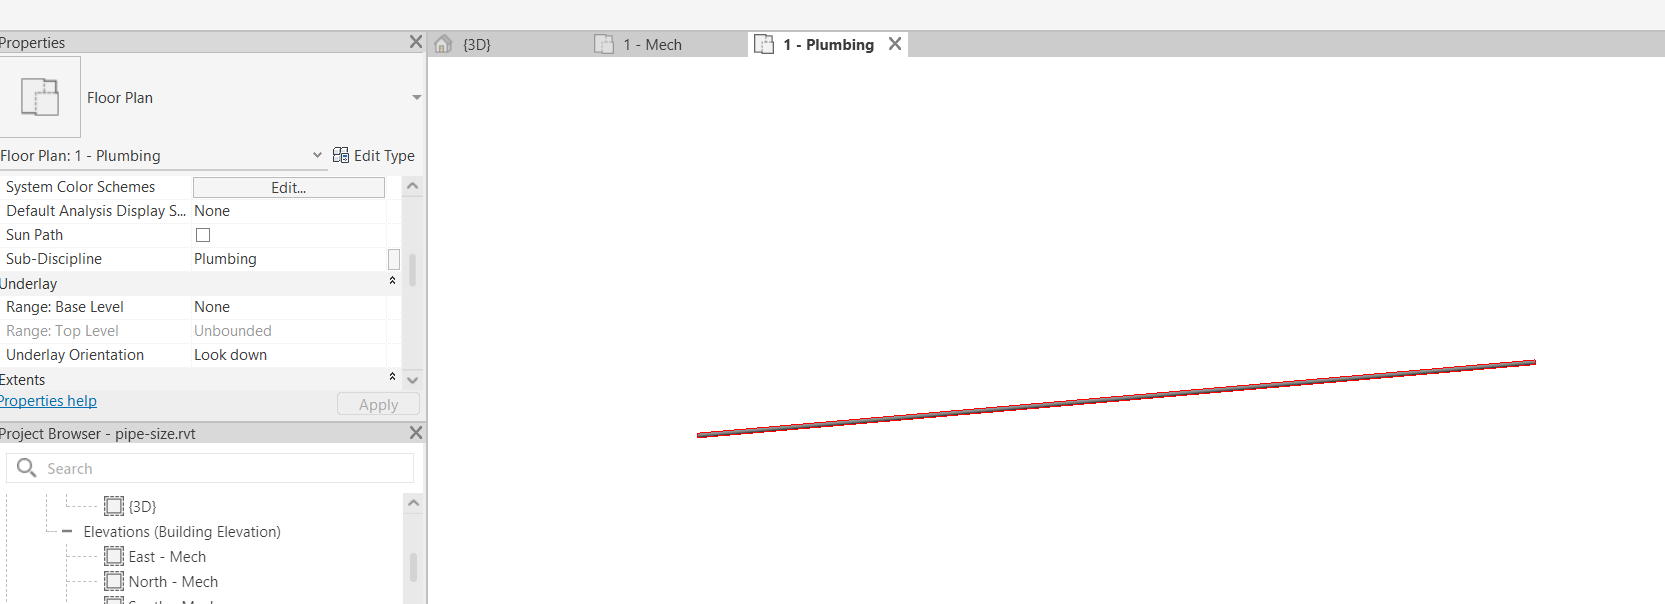
We have a project open in Revit with a pipe already modeled in it.
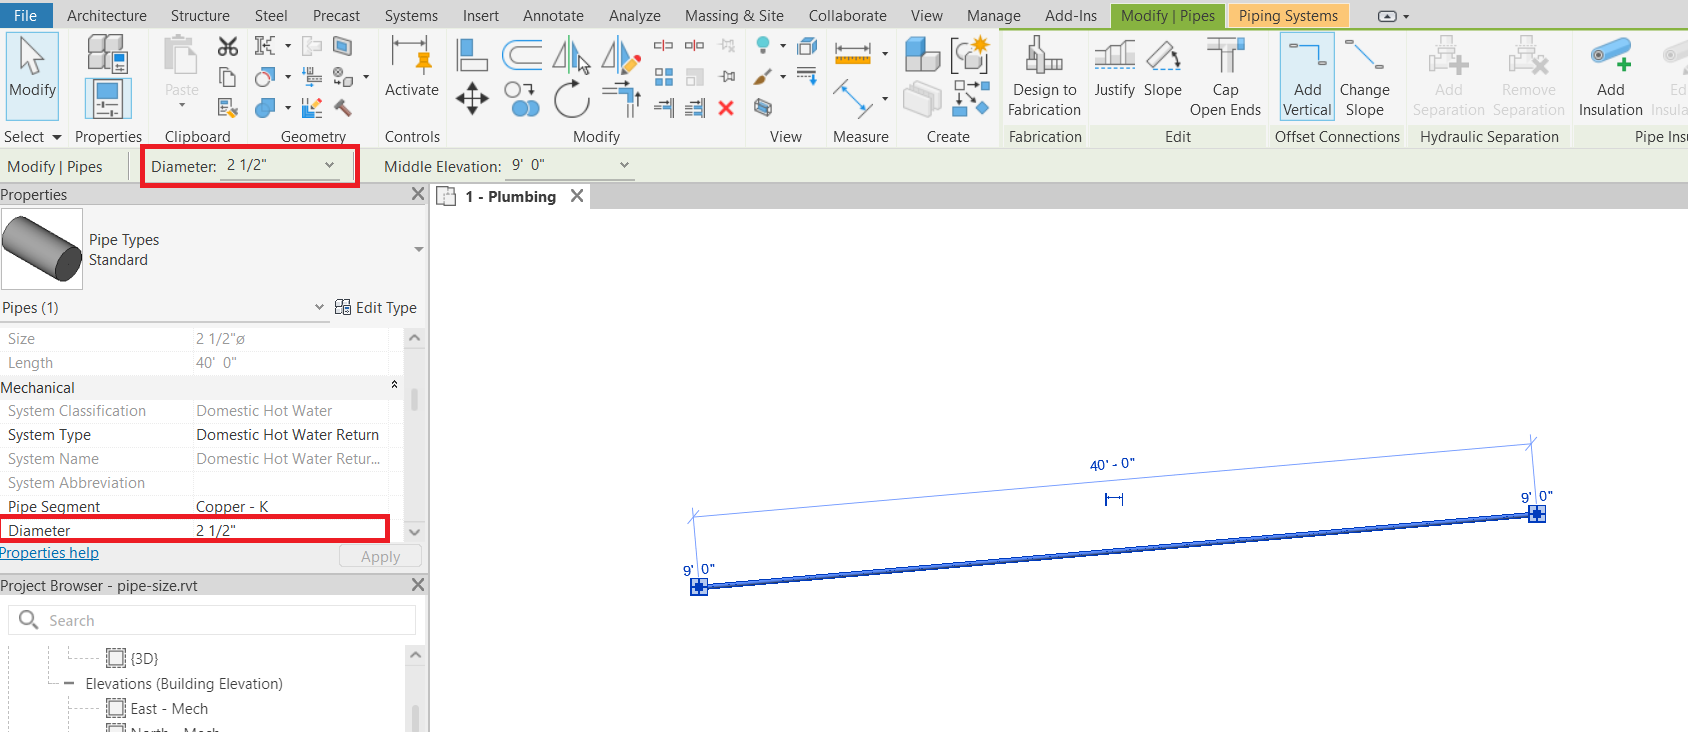
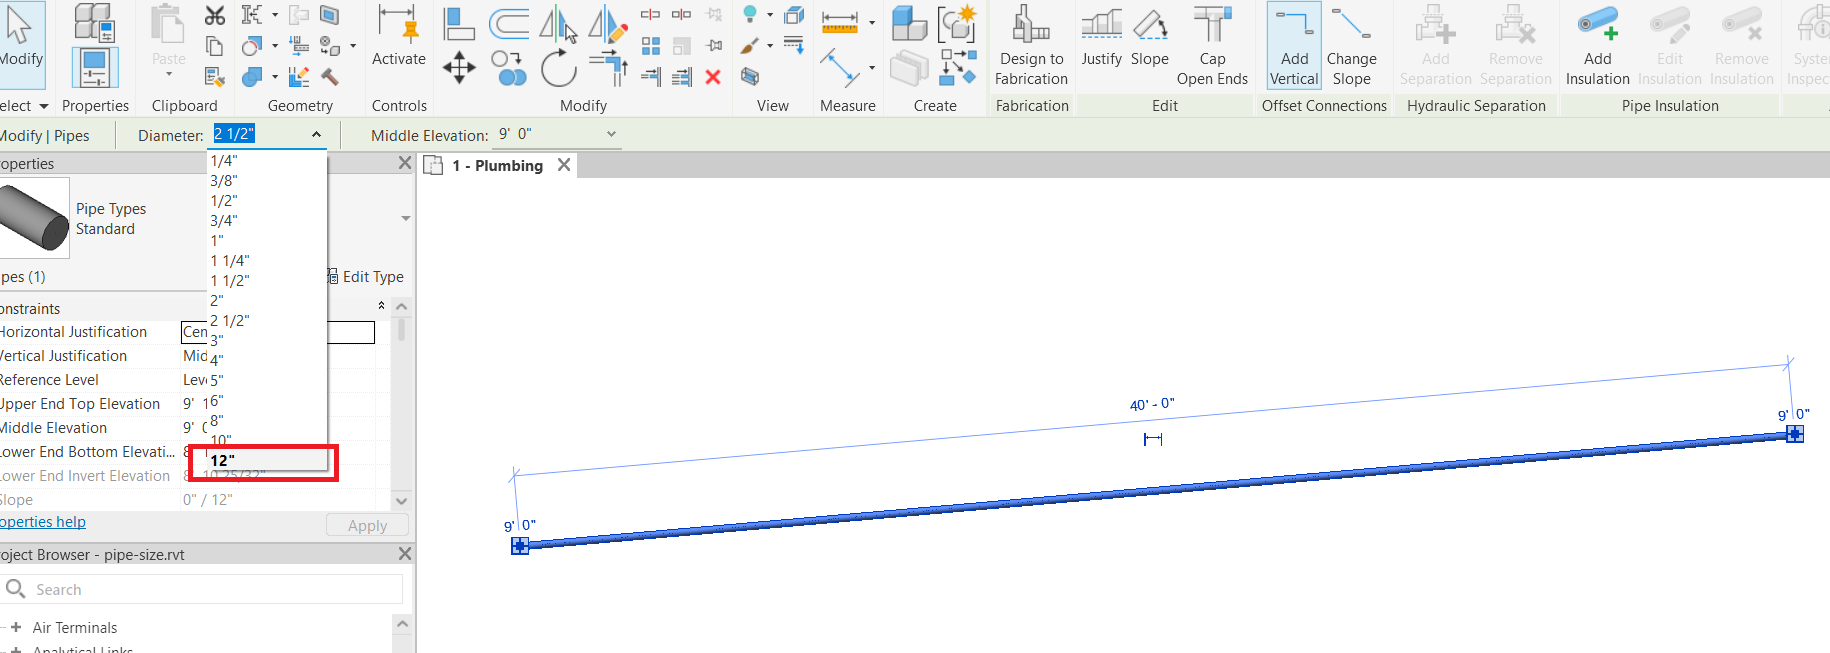
We click on the pipe and see its diameter in both the properties palette and the green ribbon.
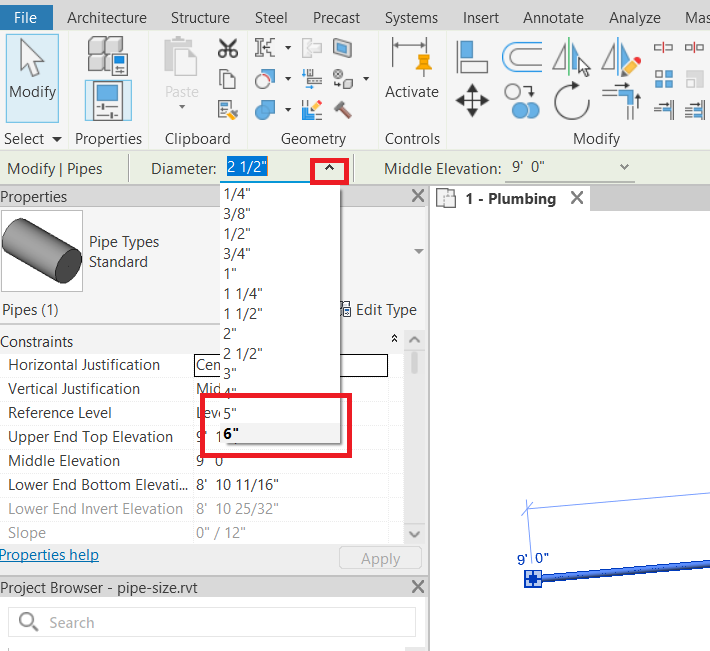
If we try to change the pipe size (diameter), we see that the maximum size we can select from the list is 6”.
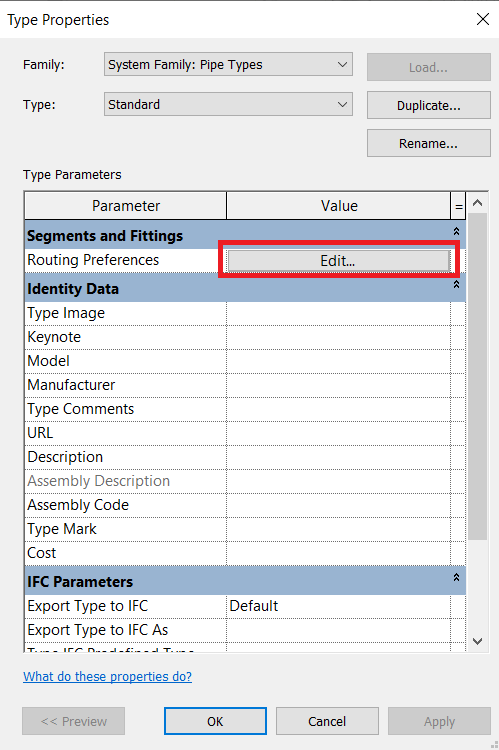
But what if we want to make it a 12” pipe? In that case, while the pipe is still selected, we click on Edit Type.

The Type Properties appears, from which we click on Edit in front of the Routing Preferences.
In the Routing Preference window, we see that the Pipe Segment is Copper – k, and its Maximum Size is 6”.
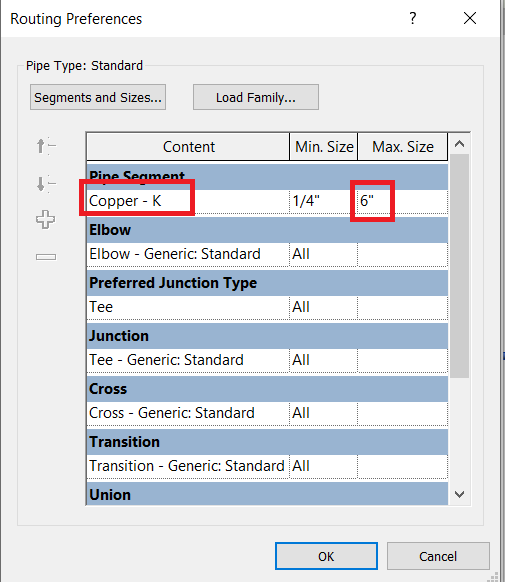
We change the Max. Size to 12” and click on OK.
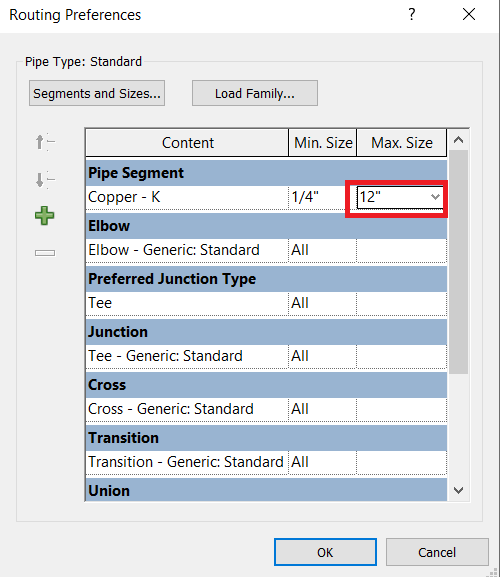
Click on OK again to close the Type properties and go back to the project environment. Make sure to deselect the pipe and select it again. This time, we can change the size to 12”.
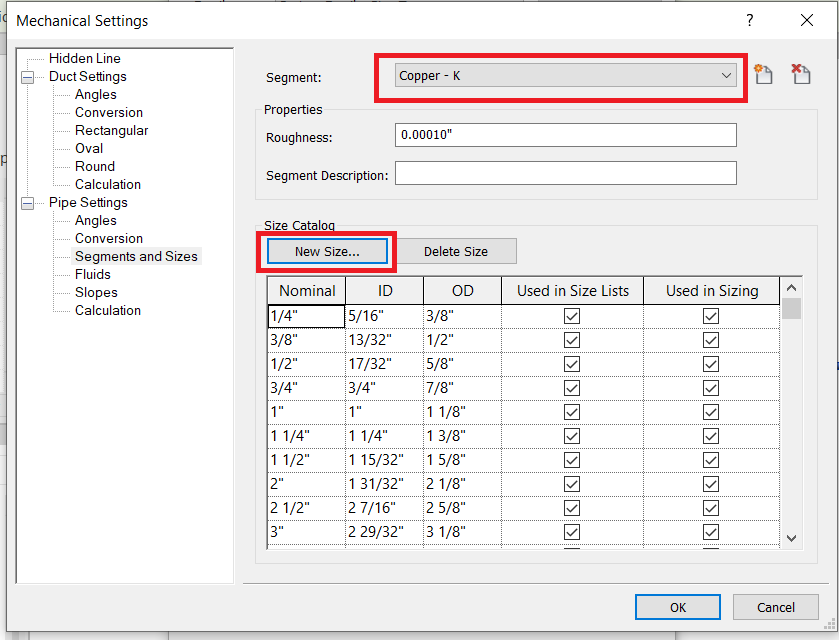
If you still need to select a pipe size that is not listed, go back to the Routing Properties window and click on Segments and Sizes.
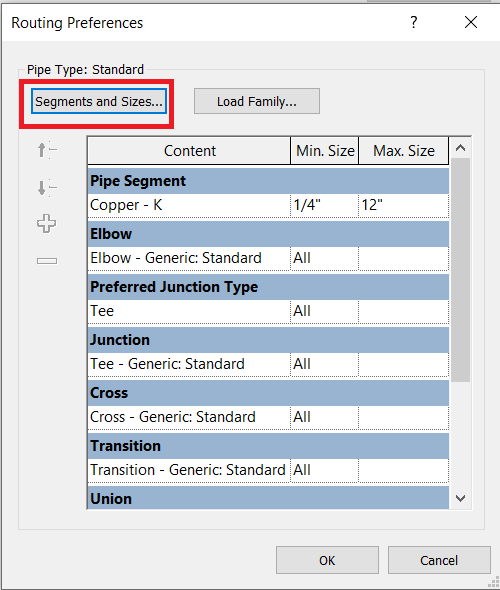
In the Mechanical Settings window, first, pick the correct Segment, and then check the Size Catalog. If the size you need is not listed in the Size Catalog, click on New Size and create it.
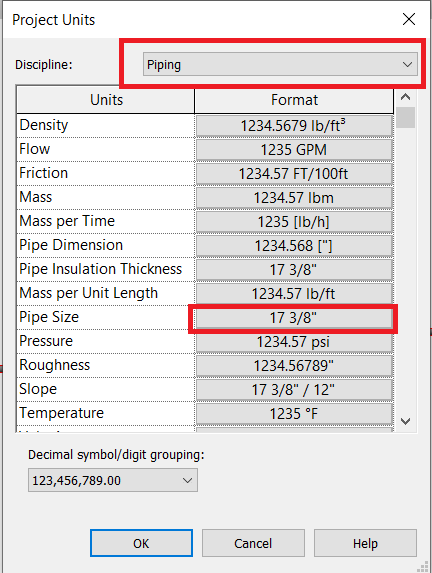
If your problem is still not resolved, it might be because you are trying to pick a size that includes fractional inches. In that case, go to the Manage tab and click on Project Units.

In the Project Units window, change the Discipline to Piping. Then click on Pipe Size.
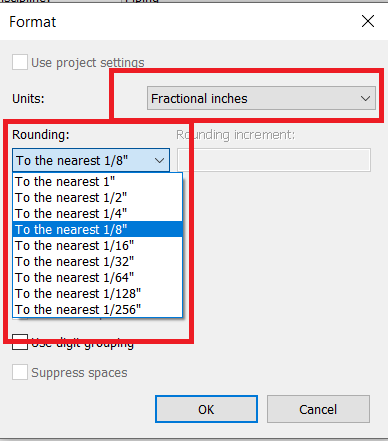
Make sure you pick the units and rounding that match your pipe sizing requirements.
If you found this blog post useful, please keep NovelBIM in mind if you need Revit modeling services in the future.
